iPad interface
Interface Components
The Aeon Timeline interface is composed of three main sections:
1
The toolbar, which runs along the top of the screen
2
The side bar, which is on the left side of the screen
3
The main view, which shows either the Timeline View or Relationship View
Toolbar
The toolbar provides access to several commonly used functions. From left to right:
1
< Timelines button. Tap to close the current timeline and return to the document selection screen.
2
Timeline title. This shows the current name of the timeline. This also acts as the file name when sharing the timeline with other devices via iCloud or Dropbox.
3
View buttons. Tap on the clock icon to see the Timeline View. Tap on the grid icon to see the Relationship View.
4
Search button. Tap to bring up the search bar to find events matching particular text.
5
Filter button. Tap to toggle the filter on or off. Filtering allows you to determine which events are currently visible on the timeline, hiding the rest.
6
Undo button. Tap this to undo the last edit you made.
7
Redo button. Tap this to redo an edit you have just undone.
The timeline can be placed into Edit Mode, which highlights the toolbar in a different colour and shows an alternative set of icons.
Side Bar
The Side Bar provides access to more commonly used functionality, including adding content to your timeline. From top:
1
Add Event button. Tap this to add a new event to your timeline. In Timeline View, the event will be added at the centre of your current scroll position.
2
Entity Type buttons (multiple). One for each entity type in your Timeline Settings. Tap on these to see a list of entities of that type (e.g. see all Characters). This list can be used to quickly filter events by group and to add new entities to your timeline.
3
Bookmark button. The last icon in the top section is the Bookmark icon. This can be used to quickly navigate to the first and last events in the timeline, or the previous or next event outside your current horizontal scroll position. You can also add your own named bookmarks to make it easy to quickly navigate between different time periods.
4
Settings button. The cog icon opens Timeline Settings
5
Notifications button. The bell icon opens Notifications and Suggestions
6
Collapse arrow. Collapses (or expands) the Side Bar so that it takes up less room. In collapsed mode, icons are shown instead of text.
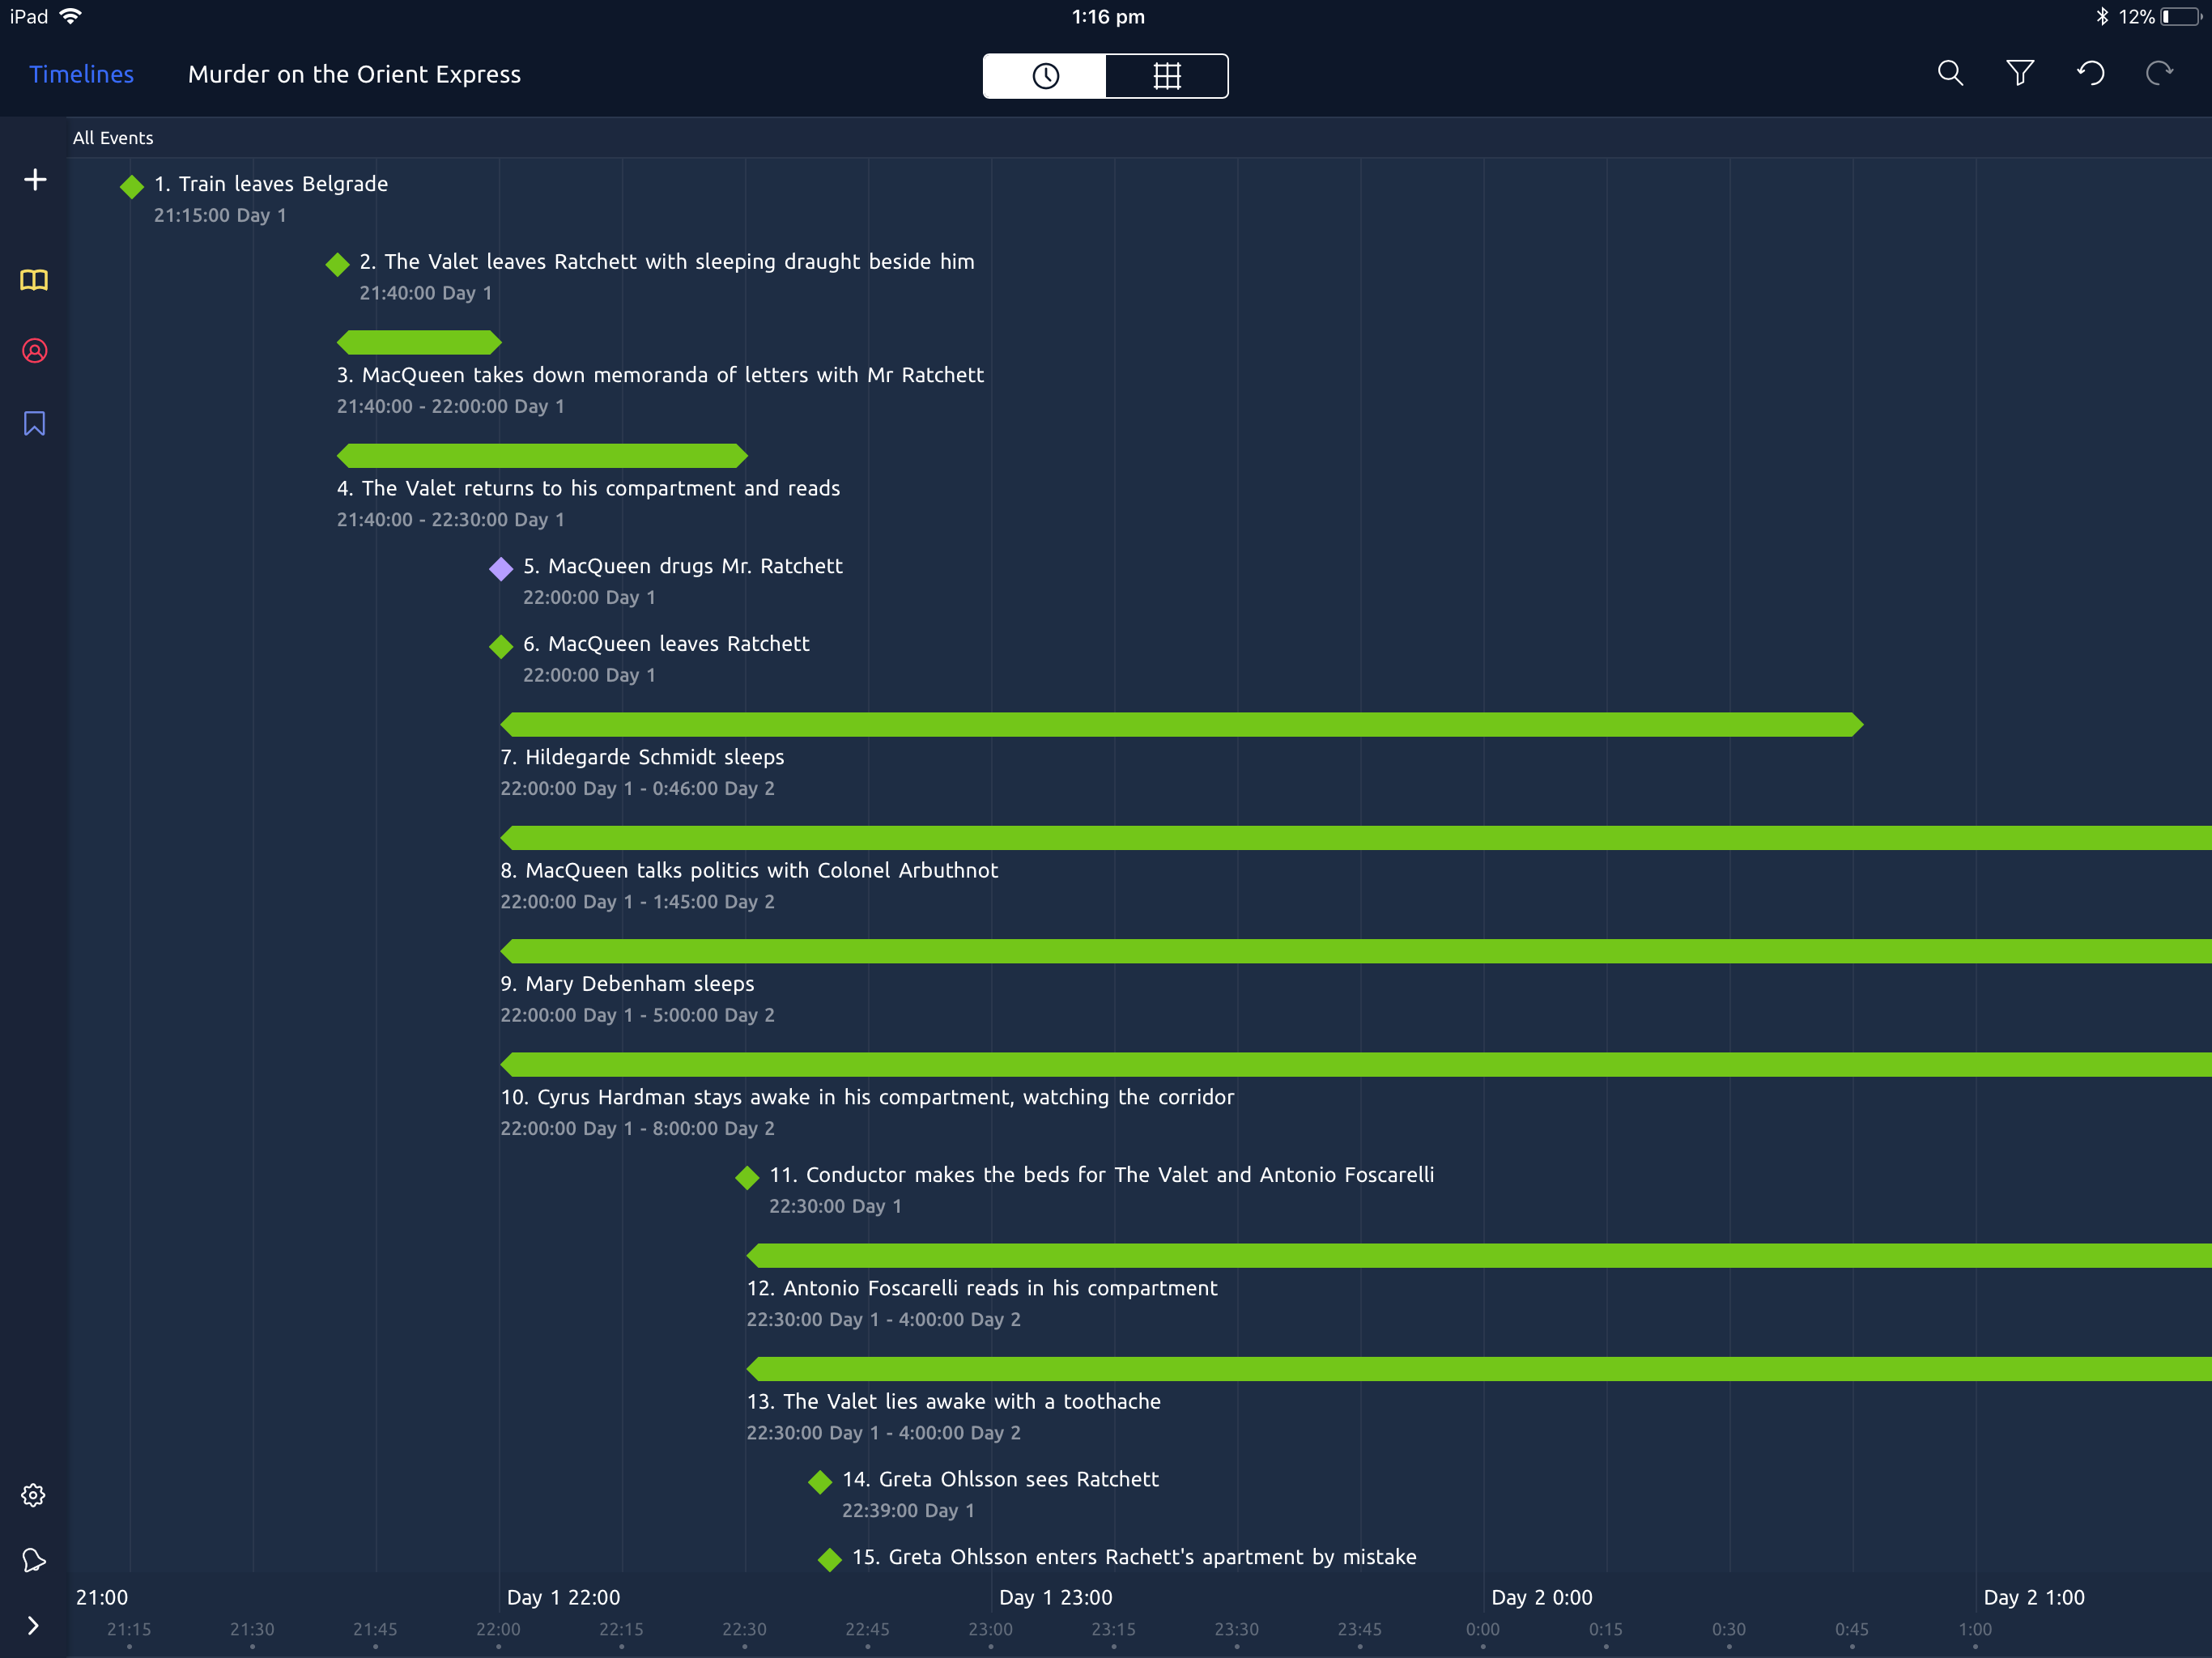
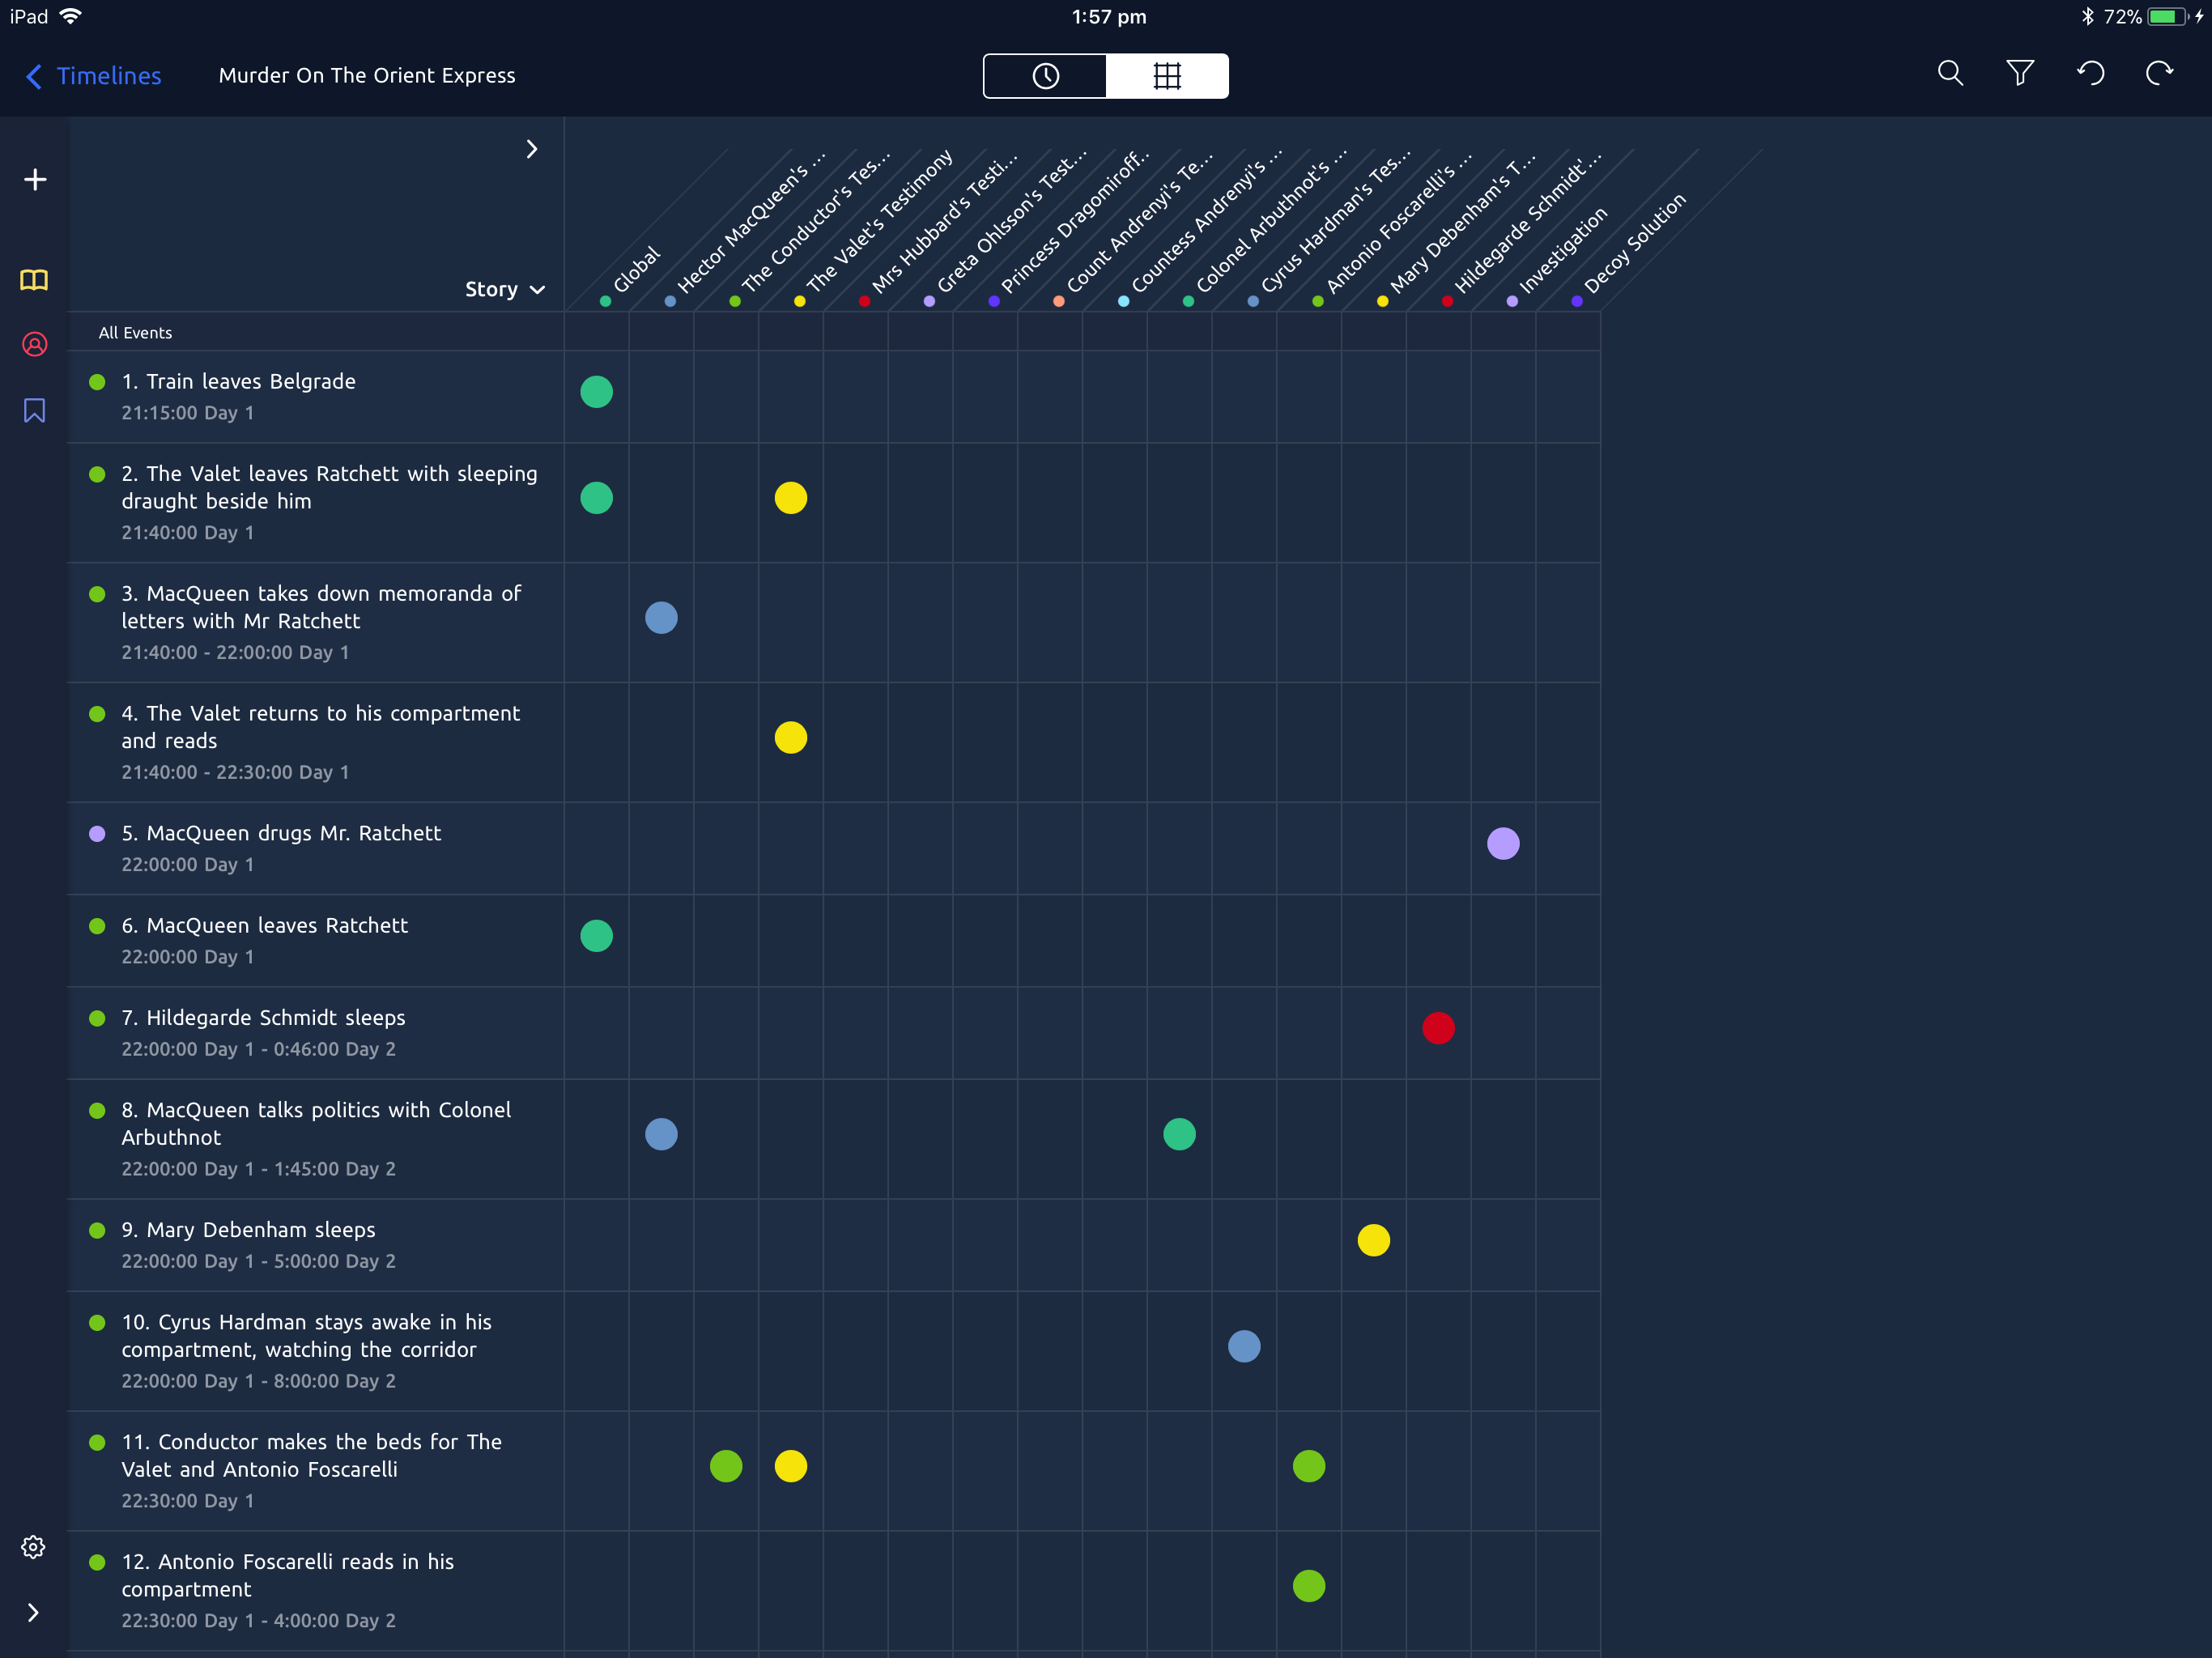
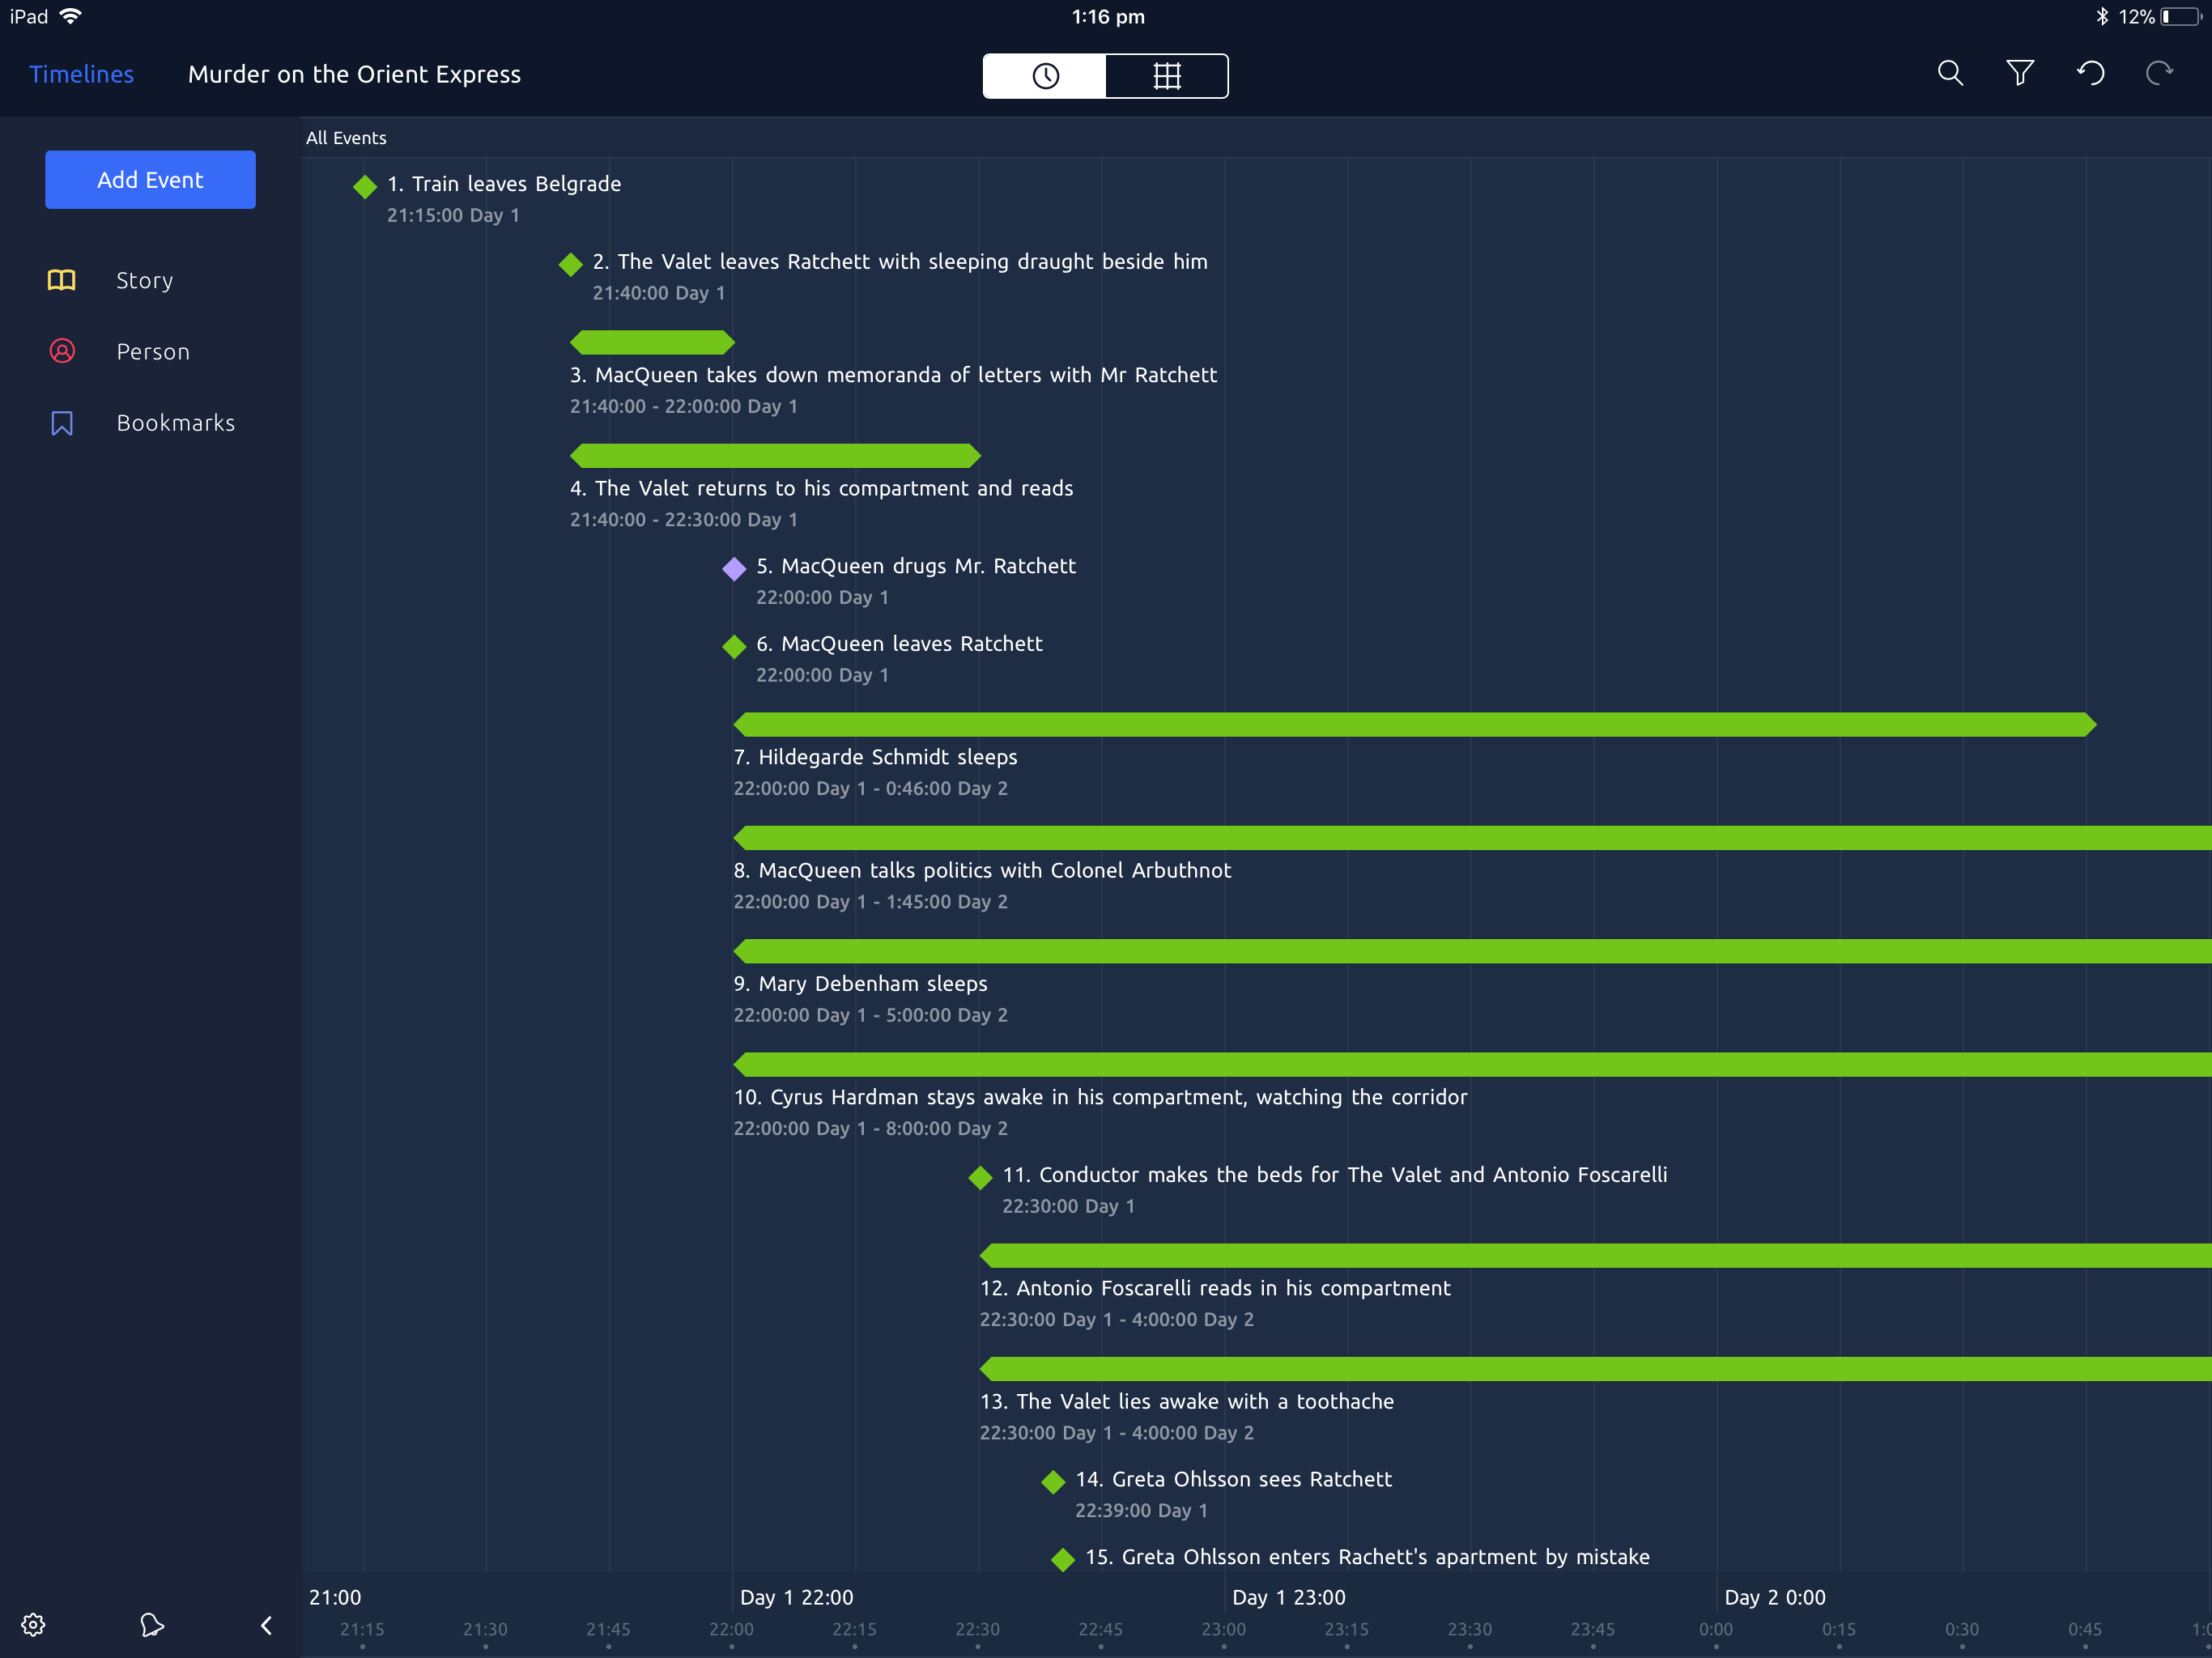
Main View
The rest of the screen is taken up with either the Timeline View or the Relationship View.
Timeline View: This shows your timeline content in a graphical format, where time is represented linearly on the horizontal axis. The bottom of the screen indicates the dates for your current scroll position.
Relationship View: This shows your timeline content in a vertical table format. Events are shown in rows in chronological order, while entities are shown in columns across the top of the screen. The intersection between rows and columns indicates any relationships that exist between events and entities.