The Inspector
Editing selected events
You can open or close the Inspector by clicking on the Inspector icon  on the toolbar.
 on the toolbar.
You can use the Inspector to update all fields, values and relationships for the selected event.
The Inspector allows you to edit values for multiple selected events at the same time:
- When multiple events are selected, the Inspector will show any values or relationships that are common for all selected events.
- Values that differ between selected events will be shown as blank.
- You can still edit those events, in which case all events will be set to the new value that you enter.
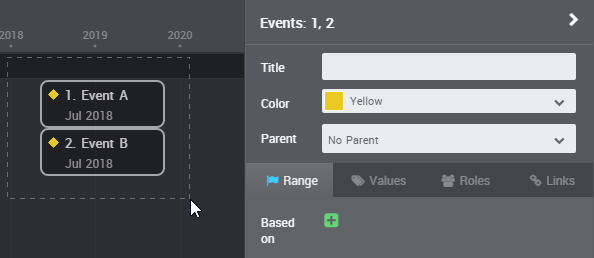
Basic Event Details

The top section of the Inspector shows the following information:
Selected Event IDs: This shows the IDs of all selected events. Clicking on an ID will scroll that event into view on the timeline.
Event Title: The title of the selected events.
Color: The color of the selected events.
Parent: The parent event of the selected events (see Nested Events).
The Range Tab

Start, Duration and End
The range tab allows you to specify the start, duration, and end for an event.
Internally, Aeon Timeline records events Start Dates and Duration, with the End Date calculated from those two values. This allows an event to retain the same duration as it is dragged around the timeline.
If you enter an end date, Aeon Timeline will calculate the necessary duration for the event to stretch from the start date to your entered end date, and will then store this value internally.
Subsequently changing the start date will cause the end date to be recalculated.
Using the Date Picker
Aeon Timeline uses a flexible date picker control that allows you to type dates in many different formats and with a range of precisions, such as:
- 2012 (year-only)
- 2012 BC (year-only, different era)
- March 2012 (month+year only)
- 23 March 2012 (date, long format)
- 23/3/2012, 3/23/2012, 2012-3-23 (date, various short formats)
- 23 March 2012 2:30pm (date and time, minute precision)
- 23 March 2012 14:30 (date and time, 24-hour format)
- 23 March 2012 14:30:27 (date and time, second precision)
You can also click on the calendar icon to view a popover calendar display to select a date.
Using the Duration Control
For date based timelines, enter your preferred duration as a value followed by a unit. Possible unit values are years, months, weeks, days, hours, minutes, and seconds (e.g. “2 years” or “15 weeks”).
Combinations of units is also allowed (e.g. “2 years 3 months”).
You can type y, m, w, d, h, mi, s as a shorthand and the Duration Picker will automatically complete the rest of the unit.
Event Precision
The precision for an event will be determined by the maximum precision of the start date and duration that you enter.
For instance, if you enter a start date of 2012 and a duration of 3 years, Aeon Timeline will only display year information on the timeline (i.e. 2012-2014).
Conversely, if you enter 2012 and 2 months, the event precision is now months, and a date value of January – February 2012 will be shown instead.
Dependencies (Based on, Successors)

The range tab also shows you information about any dependencies associated with an event.
The Based on list shows any dependencies that are used to calculate the selected event’s start date. You can add further dependencies by clicking on the add (+) icon, or edit the existing dependencies by clicking on the edit icon. If you wish to delete a dependency, click on the edit icon and then click on the Remove button in the ensuing popover.
The Successors list is a read-only list that shows any events whose start date is calculated from the selected event.
In either case, clicking on the title or a predecessor or successor event will scroll the timeline to that event and select it (the Inspector will then change to showing values for the newly selected event).
The Values Tab

Tags
The tags field allows you to add and delete tags from the selected events. Existing tags will be suggested to you as you begin to type.
If you need to edit the value of a tag globally wherever it appears, use the Manage Tags dialog.
Property Values
The remainder of the tab allows you to set any other property values for the selected events.
Available properties for events depends on your chosen template, and can be changed via Timeline Settings.
The type of the property determines how the property is displayed in the timeline:
- Single-line Text fields are displayed as a single line text input
- Multi-line Text properties are shown as a multi-line text area
- Yes/No properties are shown as a checkbox
- Numeric (Integer, Decimal, Currency and Percentage) properties are displayed as a number text field.
- List of Options properties are shown as a drop down box
The Roles Tab

Roles and Relationships
The Roles tab allows you to configure relationships between events and entities. This is done by choosing which events are responsible for particular roles within an event.
Each entity type (e.g. Person, Project, Location, Story Arc) is able to perform one or more roles for an event (e.g. a Person can be a Participant in an event, or a Witness). The available entity types and roles for events depends on your chosen template, and can be changed via Timeline Settings.
If a role is configured to allow only a single entity per event, it will be shown in this tab as a drop-down list. In such cases, you can select a single entity from the dropdown to perform that role, or select None if you want that role to be vacant.
If a role is configured to allow multiple entities per event, it will be shown in this tab as a list. In such cases, you can:
- Click on the + icon and select an entity name to create a new relationship (if you have a lot of entities, you can type the first few characters of the entity into the search box to narrow down the options).
- Click the + icon and type a brand new name to create a relationship to a brand new entity with that name
- Click the – icon to remove an existing relationship.
If an entity has a birth date or birth event, Aeon Timeline will automatically calculate the age for the entity at the selected event and show it underneath the entity name in the list.
The Links Tab

Links
Events can have links with images and documents on the local computer, a network drive, or over the internet. These are added as Links in the Links tab.
Events can also have images and documents embedded in the timeline file. These are added as Attachments in the Links tab.
You can also add an image as a specific type of attachment under the Image heading. This will display the image in the inspector, and if the timeline is configured to show images, it will be shown on the timeline when the event is expanded (the green arrow is clicked).
In this tab, you can:
- Add new links/attachments by clicking on the + symbol, and then either typing a title and URL/path for the file, or by clicking on the Browse button and selecting a file.
- Edit existing links by clicking on the edit icon and then changing link details.
- Remove existing links by clicking on the edit icon and then clicking Remove.
- Remove attachments and images by clicking the minus symbol
The icons underneath each link allow you to perform the following additional actions:
- Mac-only: View it inside Aeon Timeline using its Quicklook plugin
- Reveal the link in Finder (Mac) or Windows Explorer (Windows)
- Open the file in its default application
Under the Sync heading, it will show any Scrivener documents that are linked to the selected event.